The greatest audible improvements in a digital Hi-Fi system come from diagnosing and eliminating signal bottlenecks, not from expensive component upgrades alone.
- Your computer’s internal sound card is likely the first and most significant source of quality degradation due to electrical noise.
- System synergy, like matching headphone impedance to an amplifier, is more critical than the individual price tag of the components.
Recommendation: Your first investment should not be a component, but a diagnostic process: start by isolating your Digital-to-Analog Converter (DAC) from your computer’s noisy environment.
For the discerning audiophile, the quest for sonic purity is a journey fraught with conflicting advice and expensive pitfalls. The common wisdom dictates a simple hierarchy of spending: speakers first, then the amplifier, and finally the source. While not entirely wrong, this component-first approach often misses the most crucial element in a modern digital setup: the integrity of the signal chain itself. Many enthusiasts invest heavily in high-resolution audio files or powerful amplifiers, only to have the signal corrupted by an overlooked bottleneck long before it reaches their ears.
The problem is that a signal chain is not just a sum of its parts; it’s a system where the final output is defined by its weakest link. This degradation often stems from sources you wouldn’t expect, like the electrical interference inside your computer or a mismatch between your headphones and amplifier. The true art of system building isn’t about acquiring the most expensive gear, but about methodically diagnosing where the signal is being compromised and making strategic, high-impact investments to preserve its purity.
But what if the key wasn’t simply to replace components, but to understand the principles of bottleneck diagnosis? This guide abandons the conventional budget-splitting rules. Instead, we will dissect the digital audio signal path, from the source file to your ears, to identify the most common and impactful bottlenecks. We will explore why a basic external DAC can outperform a high-end internal sound card, how to achieve perfect system synergy, and where your money yields the highest return on audible investment, allowing you to build a system that honors the original recording.
This article provides a systematic framework for analyzing your setup. Follow along as we deconstruct each stage of the signal chain to reveal where true audio quality is won and lost.
Summary: A Discerning Guide to Your Hi-Fi Signal Chain
- Why Your Computer’s Built-In Sound Card Is Bottlenecking Quality?
- FLAC or 320kbps MP3:The Chemistry of Art Restoration: How Experts Save 500-Year-Old Canvases
- How to Match Headphone Impedance to Your Amp for Optimal Volume?
- The $100 HDMI Cable Myth That Wastes Your Audio Budget
- Speaker Placement: The Triangle Rule That Fixes Muddy Bass
- Diagnosing the Hardware Bottleneck: TV, Stick, or Modem?
- Stock Plugins or Waves: Which Is Essential for Professional Delivery?
- Native 4K vs. Upscaled: Is the Hardware Cost Justified?
Why Your Computer’s Built-In Sound Card Is Bottlenecking Quality?
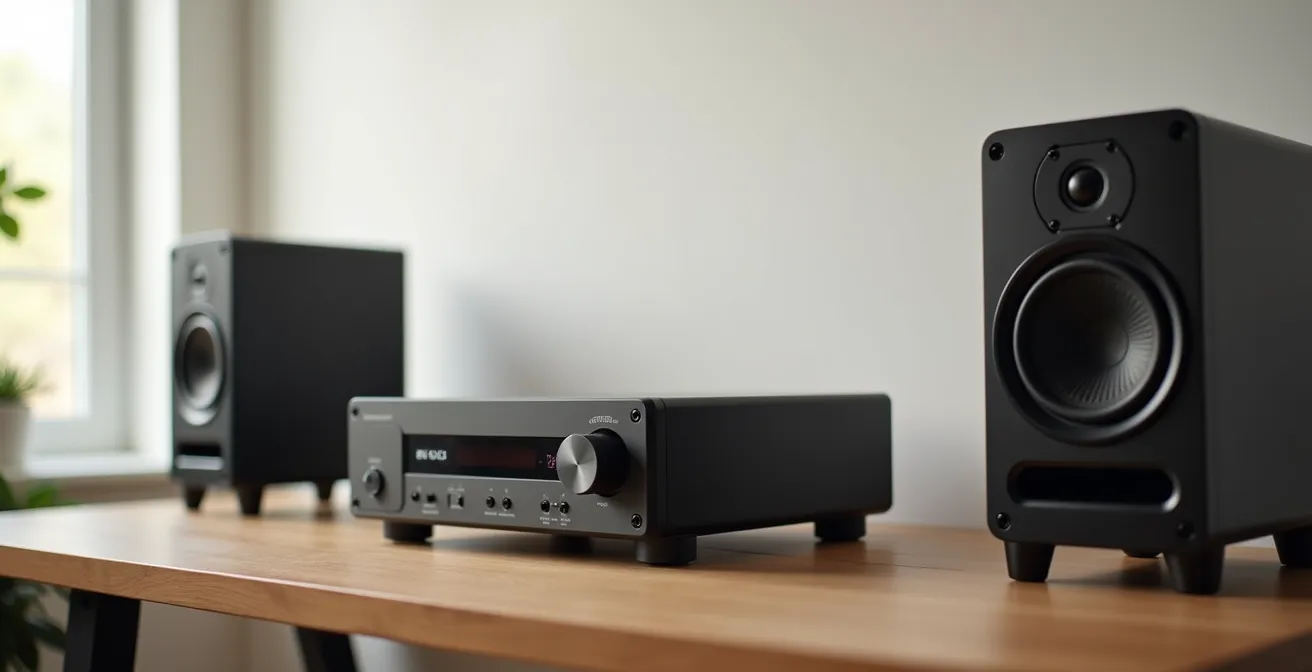
The single greatest bottleneck in most desktop audio systems is the built-in sound card. Integrated directly onto the motherboard, it exists in an environment of high-frequency electrical noise generated by the CPU, GPU, and power supply. This electromagnetic and radio-frequency interference (EMI/RFI) is picked up by the sensitive digital-to-analog conversion circuitry, injecting audible hiss, clicks, and hum into your audio signal. The audible result is a compressed dynamic range and a “hazy” or “muddy” sound that obscures fine detail, no matter how pristine your source file or powerful your amplifier is.
The technical term for this issue is a high noise floor. While a dedicated audio component aims for a signal-to-noise ratio (SNR) well over 110 dB, objective measurements show that the SNR on a standard office computer often struggles to surpass 90 dB. This means the level of the background noise is significantly closer to the quietest parts of your music, masking subtle textures and ambient cues. An external Digital-to-Analog Converter (DAC) solves this problem by physically isolating the conversion process from this hostile electrical environment. By moving this critical stage outside the computer case and providing it with its own clean power, you drastically lower the noise floor and allow the music to emerge from a blacker, silent background.
Before investing, you can diagnose this specific bottleneck yourself:
- Listen for audible noise at 90% volume with no music playing. A persistent hissing or buzzing sound indicates a high noise floor from electrical interference.
- If you have a desktop PC, try moving the internal audio cables away from the graphics card (GPU) and power supply unit (PSU). If the noise reduces, you have confirmed EMI/RFI as the culprit.
- Test the same headphones on a clean, external source like a dedicated portable audio player or smartphone. If they sound significantly cleaner and more detailed, your internal sound card is definitively the bottleneck.
Ultimately, bypassing the internal sound card is the first and most impactful step toward achieving true high-fidelity sound from a computer source. It is the foundational investment upon which all other system upgrades should be built.
FLAC or 320kbps MP3:The Chemistry of Art Restoration: How Experts Save 500-Year-Old Canvases
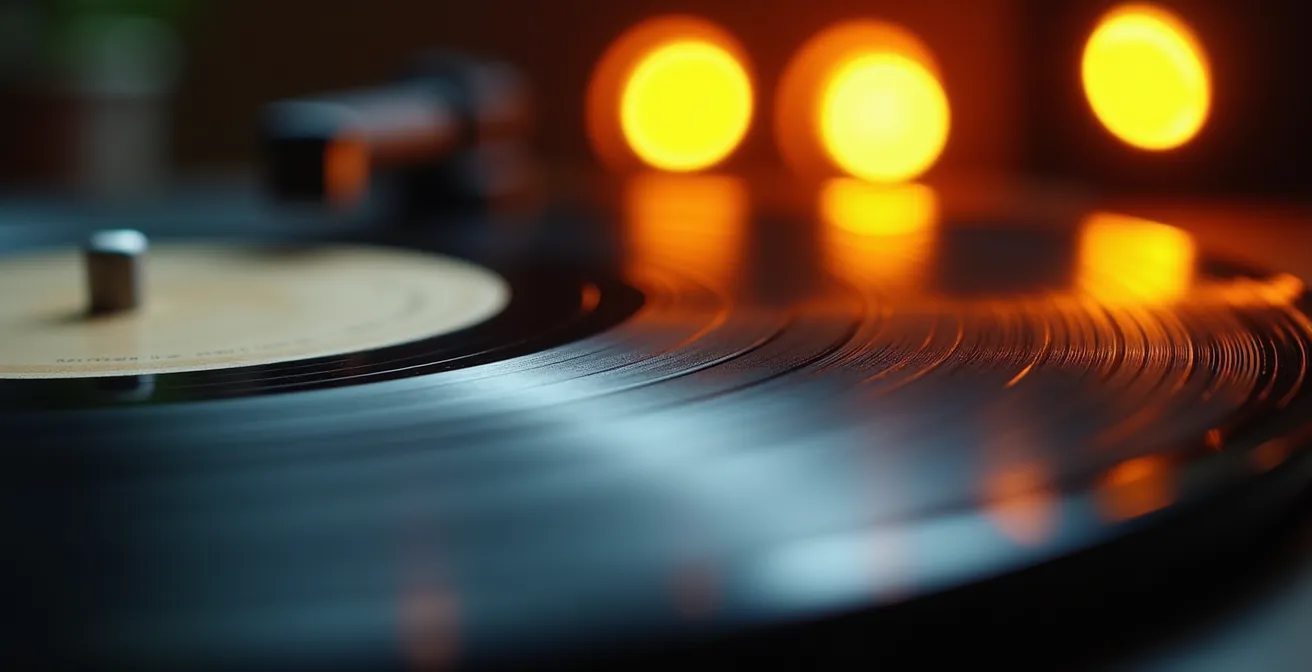
The debate between lossless formats like FLAC and high-bitrate compressed formats like 320kbps MP3 is often framed as a matter of absolute purity. However, a more useful analogy is that of art restoration. A master restorer working on a 500-year-old canvas reveals microscopic details and color nuances that are simply lost in a high-quality photographic print. Yet, if you view that restored masterpiece through a dirty, scratched pane of glass, its brilliance is once again obscured. The same principle applies to your audio chain. A lossless FLAC file contains the full, unrestored “data” of the original studio master, while an MP3 is an intelligently compressed “print” that discards data deemed inaudible.
The critical point is that the difference between the lossless “masterpiece” and the high-quality “print” is only discernible if your system—the “pane of glass”—is clean enough to resolve it. If your signal chain is compromised by a noisy sound card, mismatched components, or poor speaker placement, these bottlenecks will obscure the very subtleties that distinguish FLAC from a well-encoded MP3. Chasing lossless purity is a futile exercise if the rest of your system cannot render the additional detail.
As the experts at Xssentials Audio Team note, the goal is a system that can reproduce the artist’s original intent. This is articulated in their philosophy on creating an immersive listening experience:
A quality recording played back on a well set up system will produce focused images placed in a definable space
– Xssentials Audio Team, The Anatomy of an Audiophile Setup
Therefore, the practical approach is to first build a transparent, low-noise system. Once you have eliminated the major bottlenecks and have a “clean pane of glass,” you can then perform A/B listening tests. Only then will you be in a position to truly appreciate the restored details present in lossless files and decide if that final layer of fidelity is a worthy investment for your listening priorities.
How to Match Headphone Impedance to Your Amp for Optimal Volume?
One of the most technical yet crucial aspects of system synergy is matching your headphones’ impedance and sensitivity to your amplifier’s output capabilities. This is not about good or bad components, but about electrical compatibility. Impedance (measured in ohms, Ω) is the resistance the headphones present to the amplifier’s signal. Sensitivity measures how loud the headphones will get for a given amount of power. An improper match creates a significant bottleneck, resulting in either low volume, poor control over the driver, or excessive noise.
Think of it this way: high-impedance headphones (e.g., 250-600Ω) are like a narrow, high-pressure hose; they require high voltage (“pressure”) from the amplifier to deliver sound. Low-impedance headphones (16-50Ω) are like a wide, low-pressure hose; they demand high current (“flow”) to perform correctly. An amplifier designed to deliver high voltage may struggle to provide the current needed by a low-impedance planar magnetic headphone, resulting in weak, anemic bass. Conversely, a high-current amp might have a noise floor that is audible with highly sensitive, low-impedance in-ear monitors (IEMs).
Case Study: The Objective2 Amplifier Design
The iconic Objective2 amplifier provides a perfect example of purpose-driven design. It was engineered specifically with the challenge of driving 600-ohm Beyerdynamic headphones as a core criterion. The entire design philosophy focused on providing enough voltage swing to drive these demanding headphones to “hearing-dangerous volumes with headroom to spare,” demonstrating that an amplifier’s merit lies in its suitability for a specific task, not just its raw power figures.
This matrix illustrates the different challenges presented by various headphone types, highlighting why a “one-size-fits-all” amplifier is a myth. The key is to ensure your amplifier’s output is optimized for the specific voltage and current demands of your chosen headphones.
| Impedance/Sensitivity | Low Sensitivity | High Sensitivity |
|---|---|---|
| Low Impedance (16-50Ω) | Needs: High current Challenge: Control & damping Example: Planar magnetics |
Needs: Moderate current Challenge: Noise floor Example: Most IEMs |
| High Impedance (250-600Ω) | Needs: High voltage Challenge: Sufficient gain Example: Beyer DT880 600Ω |
Needs: Moderate voltage Challenge: Finding quiet amp Example: Sennheiser HD650 |
The $100 HDMI Cable Myth That Wastes Your Audio Budget
In the world of digital audio, few topics are as contentious as cables. Boutique manufacturers market “audiophile” USB, optical, and HDMI cables for hundreds or even thousands of dollars, promising enhanced clarity, deeper bass, and a wider soundstage. This creates a “phantom bottleneck” where audiophiles spend significant portions of their budget on a problem that, in the digital domain, rarely exists. For digital signals like those carried over HDMI or USB, the data is transmitted as a stream of ones and zeros. The cable’s job is simply to deliver that data from point A to point B without errors.
Unlike analog cables, where electrical properties can color the sound, a digital cable either works or it doesn’t. If the data arrives intact, a $10 cable and a $1,000 cable will produce bit-for-bit identical results. The error correction built into these protocols is incredibly robust. You would need a catastrophically poorly made or damaged cable to introduce audible errors, which would manifest as pops, clicks, or complete signal dropouts—not subtle degradations in soundstage. The idea of a premium digital cable “improving” the sound is akin to believing a gold-plated Ethernet cable will make your emails more eloquent.
Budget Allocation Wisdom from Pro Audio
Professional retailers like B&H Photo Video advise a balanced approach. They recommend dedicating a reasonable portion of a system’s budget to high-quality, well-shielded cables primarily for their durability and reusability in future systems. However, they emphasize that “the sound system will ultimately sound like the weakest link in the signal chain.” Overspending on one component, especially a digital cable with diminishing returns, at the expense of a better DAC, amplifier, or speakers is a strategically poor investment that violates the principle of balanced system building.
The money spent on an exotic digital cable is almost always better allocated to a tangible bottleneck. Upgrading from a motherboard’s built-in audio to a basic $100 external DAC will yield a night-and-day improvement, whereas swapping a functional $10 HDMI for a $100 version will produce no discernible difference. Focus your budget on the components that perform the critical tasks of conversion, amplification, and acoustic transduction.
Speaker Placement: The Triangle Rule That Fixes Muddy Bass
After investing in quality components and ensuring a clean signal path, you arrive at the final and most impactful frontier: the acoustic interface. This is the point where electrical signals are converted into physical sound waves that interact with your room and your ears. No component, regardless of price, can overcome the laws of physics that govern room acoustics. The most common and damaging error is improper speaker placement, which can turn a high-end system’s output into a muddy, incoherent mess, particularly in the bass frequencies.
The foundational principle for two-channel stereo listening is the equilateral triangle. The distance between the two speakers should be equal to the distance from each speaker to your listening position (the “sweet spot”). This simple geometric arrangement is the key to creating a coherent and stable stereo image, where instruments and vocals appear to originate from specific points in the space between the speakers. When speakers are too close together, the soundstage collapses into a mono-like center. When they are too far apart, a “hole” appears in the middle of the stereo image.
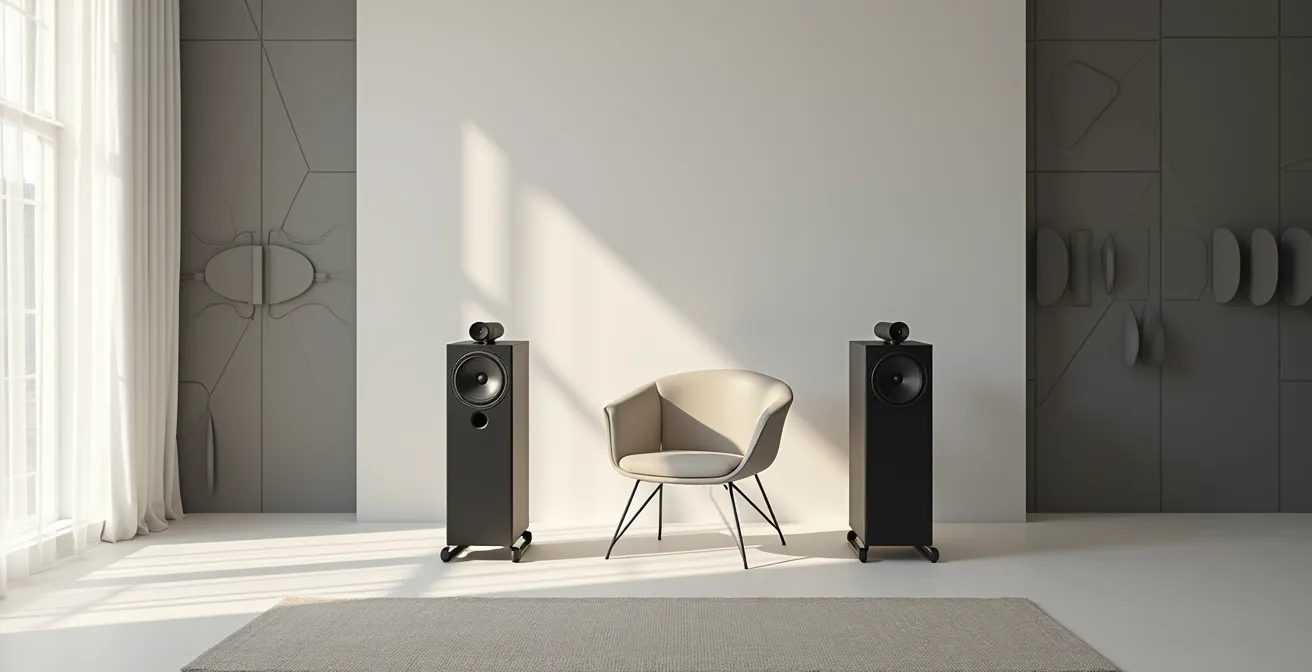
Beyond the triangle, the interaction with room boundaries (walls, floor, ceiling) is critical. A phenomenon known as Speaker Boundary Interference Response (SBIR) causes significant peaks and nulls in the bass response. A speaker placed too close to a wall will have its bass output reinforced, leading to a boomy, indistinct sound. Conversely, certain distances can cause phase cancellations that create a “suck-out,” making the bass seem to disappear entirely. Fine-tuning the distance of your speakers from the walls is a free upgrade that can have more impact than buying a new amplifier.
Action Plan: Speaker Boundary Interference Response (SBIR) Tuning
- Start with the equilateral triangle: Position speakers and your listening chair so they are an equal distance apart.
- Move the speakers forward and backward from the wall behind them in 6-inch increments while playing a bass-heavy test tone or track.
- Listen for the position where the bass sounds tightest and most defined, not boomy or anemic. Mark this spot.
- Experiment with the “toe-in” angle. Pointing speakers directly at the listening position creates a sharper center image, while pointing them straight ahead creates a wider, more diffuse soundstage.
- Fine-tune the height so that the tweeters (the small high-frequency drivers) are at the same level as your ears when you are seated.
Diagnosing the Hardware Bottleneck: TV, Stick, or Modem?
In the age of high-resolution streaming, the signal chain often begins long before your DAC. Your home network and streaming device itself can become significant bottlenecks, degrading audio quality before it even enters your Hi-Fi system. Services like Tidal, Qobuz, and Amazon Music HD offer lossless and high-resolution streams that demand a stable, high-bandwidth connection. Intermittent dropouts, clicks, or a sudden down-sampling to a lower quality are often symptoms of a network bottleneck, not a faulty DAC.
The first step in diagnosis is to test your Wi-Fi speed and stability at the location of your streaming device (e.g., a smart TV, Apple TV, or Wi-Fi streamer). Insufficient bandwidth or high latency will cause the streaming service’s app to buffer or automatically switch to a lower bitrate, compromising signal integrity. For critical listening, a wired Ethernet connection is always superior to Wi-Fi, as it eliminates the potential for wireless interference and instability. This is a simple, low-cost fix that can solve a myriad of streaming-related audio problems.
Furthermore, the streaming device’s own audio processing can be a hidden bottleneck. Many smart TVs or streaming sticks, for example, will automatically re-sample all audio to a fixed output rate (typically 48kHz) for compatibility with their internal video processing. This means that even if you are streaming a 96kHz “Master” quality file from Tidal, your TV may be down-sampling it before it ever reaches your external DAC or AVR via HDMI ARC or optical out. This unnecessary processing stage degrades the original signal. To maintain a bit-perfect stream, it is always best to connect a dedicated audio streamer directly to your DAC, bypassing the TV’s audio circuitry entirely.
Identifying this bottleneck requires a DAC that displays the incoming sample rate. If the display shows “48kHz” while you are playing a “96kHz” or “192kHz” file, you have confirmed that your streaming device is the component compromising your signal’s integrity.
Stock Plugins or Waves: Which Is Essential for Professional Delivery?
Once the physical placement of speakers has been optimized, the final, unyielding bottleneck is the room itself. Every room imposes its own sonic signature on the sound, creating peaks and dips in the frequency response due to reflections, standing waves, and modal resonances. This is where Digital Signal Processing (DSP), specifically for room correction, becomes one of the highest-ROI investments an audiophile can make. The question is not whether to use stock plugins or expensive third-party suites like Waves, but to embrace the philosophy of DSP as a corrective tool.
Good DSP doesn’t alter the art; it removes the room’s distortion, like cleaning a dirty window to see the original painting more clearly
– Audio Engineering Community, DSP Room Correction Philosophy
This quote perfectly encapsulates the role of room correction. It is not about adding effects or “flavoring” the sound. It is a precision tool used to counteract the acoustic problems of the listening environment, allowing the speakers’ true performance to be heard. By using a measurement microphone (like the UMIK-1) and software (like the free Room EQ Wizard or paid solutions like Dirac Live), you can generate a precise profile of your room’s acoustic errors. The DSP then creates a custom inverse equalization curve to flatten the frequency response at the listening position.
The result is a dramatic improvement in clarity, imaging, and especially bass definition. Boomy, one-note bass is tightened into a textured, articulate low end. Midrange frequencies, often muddied by reflections, become clearer, enhancing vocal and instrumental timbre. For many, the improvement from well-implemented DSP is far greater than upgrading a DAC or amplifier. In fact, for a modest investment, a $200 measurement mic and software can achieve results that would otherwise require thousands of dollars in acoustic treatment or speaker upgrades. It is the most logical and powerful tool for addressing the final, unavoidable bottleneck in the signal chain.
Key Takeaways
- The most significant audio upgrade is often the cheapest: moving from noisy internal sound cards to a clean external DAC.
- System synergy, such as matching amplifier output to headphone impedance, trumps the individual cost of components.
- Room acoustics are the final bottleneck; proper speaker placement and DSP correction offer a higher return on investment than most hardware upgrades.
Native 4K vs. Upscaled: Is the Hardware Cost Justified?
In the context of digital audio, the “Native vs. Upscaled” debate translates to the pursuit of exotic DAC features versus investing in solid fundamentals. High-end DACs often market features like MQA decoding, DSD up-sampling to extreme rates, or selectable digital filters. While technically interesting, these features offer marginal, if any, audible benefits for most listeners. The real bottleneck is rarely the lack of a specific up-sampling algorithm but the core quality of the DAC’s implementation: its power supply, analog output stage, and immunity to jitter (timing errors).
Chasing exotic features on an expensive DAC while feeding it compressed MP3s or connecting it to entry-level speakers is the definition of a misallocated budget. The principle of “Return on Investment Listening” dictates that you should prioritize the links in the chain that yield the most audible improvement per dollar. A well-engineered, basic DAC will always outperform a feature-laden but poorly implemented one. The focus should be on build quality and the performance of the core conversion task.
Case Study: The Schiit Modi+ Philosophy
A product like the Schiit Modi+ exemplifies this “fundamentals first” approach. It is a budget-friendly DAC that forgoes exotic features in favor of a high-quality conversion chip, a clean power supply, and a robust analog stage. For a minimal investment, it provides a massive sonic upgrade over any internal sound card. It proves that “the most cost-effective way to improve the sound of a system” is to get the basics right, not to chase the highest numbers or the latest marketing acronyms on a specification sheet.
This investment priority matrix clarifies the most logical upgrade path. Your budget should always be directed toward the weakest link, and for most systems, that link is not the absence of a high-end up-sampling feature.
| Investment Level | Better Choice | Worse Choice |
|---|---|---|
| $200 Budget | Basic DAC + Hi-Res music subscription | No DAC + compressed streaming |
| $500 Budget | Quality DAC (e.g., Modi+) + lossless files | Expensive upsampling DAC + MP3s |
| $1000+ Budget | Great speakers + basic DAC | Basic speakers + exotic DAC |
Before considering any expensive, feature-rich component, ensure your source material is high-quality, your amplification is synergistic, and your speakers are properly placed. This foundational approach guarantees that your hardware cost is always justified by audible results.
Frequently Asked Questions on The Hi-Fi Signal Chain
How can I tell if my streaming device is downsampling my audio?
Use a DAC that displays the incoming sample rate and bit depth. Every device producing digital audio needs a DAC to continue down the signal chain – if your DAC shows 48kHz when playing 96kHz files, your streaming device is the bottleneck.
Why does my music cut out during streaming?
Test your Wi-Fi speed near the streaming device. Modem/router issues cause dropouts due to insufficient bandwidth, especially for high-resolution audio streaming which requires stable connection speeds.
Should I bypass my TV’s audio processing?
Yes, if possible. TVs often add unwanted audio processing that can flatten dynamics. Connect your streaming device directly to your DAC or AVR using optical or HDMI ARC to maintain bit-perfect streaming.