
Your vocals sound muddy and feedback-prone in difficult rooms not because of your gear, but because of misunderstood physics. The solution isn’t more expensive equipment, but mastering how your microphone interacts with its environment. By understanding concepts like the proximity effect, polar pattern nulls, and proper gain structure, you can make any mic work for you, transforming a chaotic mix into a clear and powerful performance.
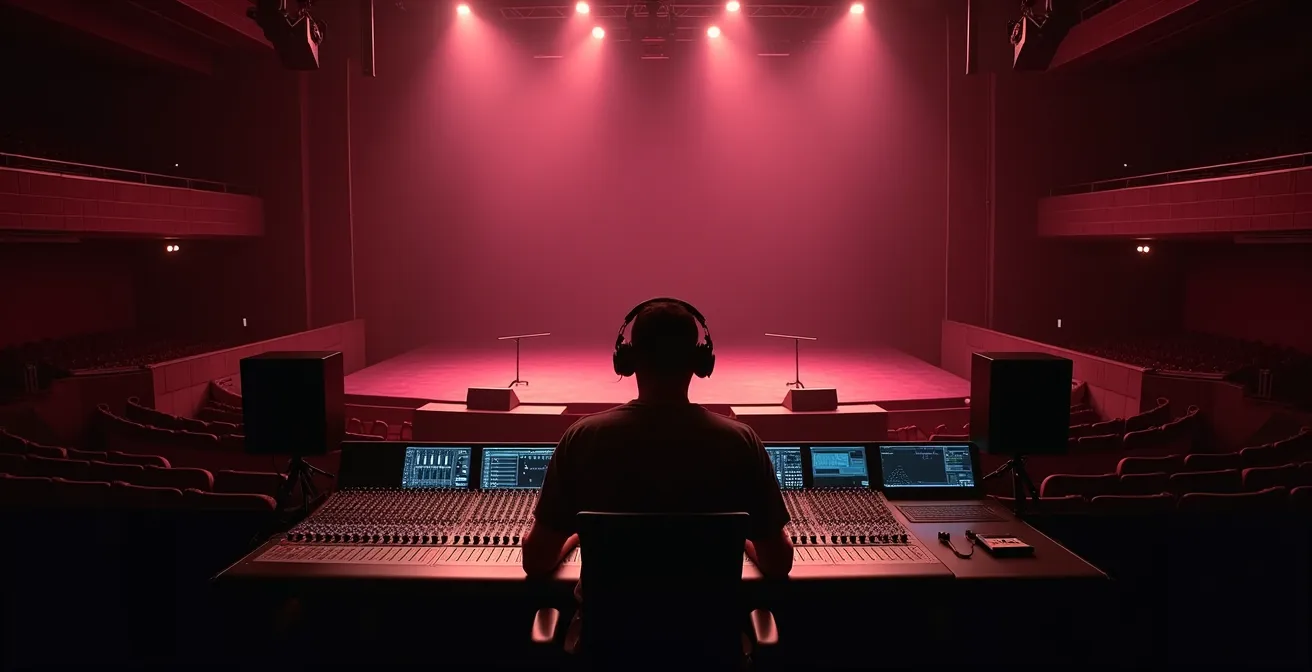
We’ve all been there. The vocal sounds pristine and powerful during soundcheck in an empty room. Then the doors open, the crowd fills in, the stage volume creeps up, and suddenly the singer is buried in a muddy, feedback-ridden mess. The common reaction is to blame the room’s terrible acoustics, the singer’s inconsistent technique, or the microphone itself. Many guides will tell you to simply “buy a better mic” or “don’t cup the grille,” but this advice only scratches the surface.
The real key to conquering a challenging live venue lies not in fighting the room with brute-force EQ, but in understanding and manipulating the fundamental physics of sound. It’s about making deliberate, informed choices that turn your microphone from a passive sound-catcher into an active tool for sonic control. This isn’t magic; it’s audio engineering. It’s about leveraging principles of directionality, proximity, and gain structure to create clarity where there was once chaos.
This guide moves beyond the generic tips to give you a practical, problem-solving framework. We’ll deconstruct the most common issues that plague live vocals in bars, clubs, and echoey halls, and provide actionable techniques to fix them at the source. From managing low-end boom to strategically placing monitors, you’ll learn to work with the laws of acoustics, not against them.
Summary: A Practical Guide to Taming Live Vocals in Bad Rooms
- Why Holding the Mic Too Close muddies the Mix?
- How to Ring Out a Room Before the Show Starts?
- Cardioid or Supercardioid: Which Mic Pattern Rejects Drums Best?
- The “Rapper Grip” Mistake That Ruins Directionality
- Mixing the Wedge: The Vocal-to-Band Ratio That Prevents Straining
- Why Your Computer’s Built-In Sound Card Is Bottlenecking Quality?
- The LUFS Mistake That Gets Your Mix Rejected by Netflix
- Transitioning from Musical Theater to Opera: The Vocal Adjustment Required
Why Holding the Mic Too Close muddies the Mix?
The “muddy” or “boomy” sound that occurs when a singer gets too close to a directional microphone isn’t a flaw; it’s a predictable physical phenomenon called the proximity effect. This effect causes a significant boost in low-frequency response as the sound source moves nearer to the mic’s diaphragm. For many dynamic vocal mics, this isn’t a subtle change. It can be a massive increase that overwhelms the mix with uncontrolled low-end energy, masking the clarity and consonants that give a vocal its intelligibility.
Just how significant is this boost? It’s not just a feeling; it can be measured. For instance, acoustic research demonstrates that a 15 dB boost below 200 Hz can occur at a 5-15 cm distance from the source. This is a colossal amount of energy concentrated in the “mud” region (around 200-500 Hz), creating a boxy, muffled tone that clashes with the bass guitar, kick drum, and low-end of the keyboards. Trying to fix this with just the channel’s low-cut filter is often a losing battle, as it can also thin out the vocal’s natural body and warmth.
The professional approach is not to simply tell the singer to “back off,” which can be unrealistic in a loud environment. Instead, the goal is to manage this predictable boost. A skilled engineer anticipates the proximity effect and uses tools like a gentle EQ cut in the 200-500 Hz range or, even better, a dynamic EQ that only attenuates these frequencies when the singer gets too close and they become problematic. Understanding this effect transforms it from a problem into a tool; a singer can intentionally move closer for more warmth on a quiet passage and back off for more clarity on a louder one, but only if the engineer has the mix prepared to handle it.
How to Ring Out a Room Before the Show Starts?
The process of “ringing out” a room is one of the most misunderstood aspects of live sound. It’s often simplified to “make it feedback, then cut the frequency,” but its true purpose is far more strategic: to maximize gain-before-feedback (GBF). This is the amount of level you can get from a microphone before it starts to squeal. In a poorly-treated room with hard, reflective surfaces, the GBF is naturally low. Ringing out the monitors and the main PA is a systematic process to surgically increase that headroom.
The process starts with a microphone placed on stage where the performer will be, pointing towards the monitors. You slowly raise the gain on that mic’s channel until the first, quietest ring of feedback begins. This isn’t a loud squeal, but a single, sustained tone. Using a graphic EQ or a parametric EQ with a real-time analyzer (RTA), you identify that exact frequency and apply a narrow cut of about 3-6 dB. Then, you raise the gain again until the next frequency begins to ring, and you repeat the process. You typically only need to notch out 3-5 of the most prominent resonant frequencies. Any more than that, and you start to drastically alter the tonal quality of the sound system.
This process is crucial because every open microphone on stage adds to the potential for feedback. As a rule of thumb, the gain-before-feedback ratio decreases by 3 dB each time the number of open mics doubles. Ringing out the room effectively “buys back” some of that lost headroom, giving you a more stable and workable mix when the whole band is playing. It’s a proactive measure that prevents you from fighting feedback all night, allowing you to focus on creating a dynamic and balanced mix for the audience.
Cardioid or Supercardioid: Which Mic Pattern Rejects Drums Best?
Choosing the right microphone is less about brand and more about the polar pattern. The polar pattern is a map of a microphone’s sensitivity to sound from different directions. For live vocals, the goal is to capture the singer in front of the mic while rejecting as much of the surrounding stage noise—especially the cymbals and snare drum—as possible. The two most common choices are cardioid and supercardioid, and their differences are crucial in a bad room.
A cardioid microphone is most sensitive at the front and least sensitive directly at the back (180 degrees). A supercardioid is also most sensitive at the front, but it is tightest at the sides (around 120 degrees) and has a small lobe of sensitivity directly at its rear. This means a cardioid mic is best for rejecting sound coming from directly behind it, while a supercardioid is better at rejecting sound from the sides.
The choice depends entirely on your stage layout. If the loudest thing behind the singer is their floor monitor, a cardioid mic is ideal because you can place the monitor directly behind the mic, in its “null point” of maximum rejection. However, if the loudest sound source is off to the side—like a crashing ride cymbal or a blaring guitar amp—a supercardioid is the superior choice because its null points are at the sides. You can physically aim the deadest part of the microphone directly at the source of the bleed. This following table breaks down the key differences.
| Pattern Type | Rear Rejection | Side Rejection | Best For | Null Points |
|---|---|---|---|---|
| Cardioid | Maximum (180°) | Moderate | Monitor directly behind | Single null at rear |
| Supercardioid | Good | Maximum (±120°) | Side noise sources | Two nulls at 120° |
| Hypercardioid | Moderate | Very Good | Multiple monitors | Two nulls at 110° |
This concept of an aimable “dead zone” is the most powerful tool an engineer has. As live sound expert Bruce Bartlett notes, this point of rejection is not just a theoretical line. He states in a ProSoundWeb article dedicated to microphone techniques:
The ‘null point’ of maximum rejection isn’t just a line on a diagram; it’s a cone in space
– Bruce Bartlett, ProSoundWeb – Microphone Techniques For Taming The Live Stage
Thinking of it this way, your job is to physically point that “cone of silence” at the drums. This single decision can clean up a vocal mix more than hours of EQ.
The “Rapper Grip” Mistake That Ruins Directionality
One of the most common and destructive habits in live performance is “cupping” the microphone—wrapping a hand around the grille. While it may look cool, it’s an acoustic disaster. It fundamentally destroys the microphone’s carefully engineered polar pattern, undoing all the work you did selecting the right mic and positioning it to reject stage noise. When a performer cups the grille, they block the rear ports that allow sound to enter from behind the diaphragm. These ports are essential for creating the phase cancellations that give a directional mic its directionality.
By blocking these ports, the hand effectively turns a directional cardioid or supercardioid mic into something resembling an omnidirectional microphone. An omni mic, by design, picks up sound equally from all directions. This is the exact opposite of what you want on a loud stage. Suddenly, the mic is no longer rejecting the floor monitors or the drum cymbals. Instead, it’s inviting them into the vocal channel, resulting in a thin, phasey vocal tone and, most critically, a massive reduction in gain-before-feedback. As one guide for live vocalists explains, this grip dramatically alters the tone and makes the microphone far more susceptible to feedback.
Educating the performer is always the best solution, but sometimes the habit is too ingrained. In these cases, the engineer must resort to damage control. This isn’t about one magic fix, but a combination of strategies to mitigate the problem. The focus shifts from preventing bleed to managing it once it’s already in the mic.
Action Plan: Managing a ‘Cupping’ Performer
- Mic Choice: Use microphones specifically designed with minimal rear-rejection ports (e.g., Telefunken M80) that are less affected by cupping.
- Gating: Implement an aggressive noise gate to shut the mic off between vocal phrases, closing the window for feedback to start.
- Dynamic EQ: Apply a dynamic EQ to automatically notch the harsh 1-2kHz “cupped” resonance only when the performer is singing.
- Monitor Position: Reposition monitors to work with the now-altered, more omnidirectional pattern, rather than directly firing into it.
- Education: If possible, demonstrate the tonal difference and feedback issues to the performer during soundcheck to encourage better technique.
Mixing the Wedge: The Vocal-to-Band Ratio That Prevents Straining
The floor monitor, or “wedge,” is the singer’s most important reference on stage. A bad monitor mix is a direct cause of poor vocal performance. If a singer can’t hear themselves clearly over the roar of the guitars and drums, their natural instinct is to push their voice harder. This vocal straining doesn’t just risk long-term damage; it immediately changes the timbre of their voice, often introducing harsh frequencies and making it even harder to place in the main mix. The goal of the wedge mix is not just loudness, but clarity and confidence.
The most common mistake is to simply keep turning up the vocal in the wedge. This creates a volume war and increases the risk of feedback. A better approach is to focus on the vocal-to-band ratio. Often, a singer can hear themselves better if you turn *down* the other instruments in their monitor. Start by sending only the vocal to their wedge. Get it to a comfortable level. Then, ask what other element is most crucial for their timing and pitch—it might be the snare and hi-hat, the acoustic guitar, or the keyboard. Add just enough of that element for them to lock in.
The key is to create space for the vocal instead of just adding more level. This might involve using the monitor EQ to carve out frequencies in the instruments that compete with the vocal’s core frequency range (typically 1-4 kHz). By giving the vocal its own sonic space in the monitor, the singer doesn’t need as much overall volume to feel confident. This reduces their vocal strain, improves their pitch, and lowers the overall stage volume, which in turn gives you, the engineer, more gain-before-feedback for the main PA. A well-crafted wedge mix is a tool that improves the performance at its source.
Why Your Computer’s Built-In Sound Card Is Bottlenecking Quality?
In the modern live sound environment, computers are everywhere—running backing tracks, hosting virtual instruments, or even for virtual soundchecks. In this context, the entire audio signal chain matters, and a frequent bottleneck is the computer’s built-in sound card. These stock components are designed for basic consumer use, not professional audio, and they introduce two major problems: poor audio conversion and high latency.
Firstly, the digital-to-analog converters (DACs) in built-in sound cards are generally low quality. They often have a higher noise floor, introducing a subtle hiss or hum into the signal before it even reaches your mixing console. Furthermore, their frequency response can be uneven, and they can suffer from “jitter”—timing errors in the digital clock that smear the stereo image and reduce transient impact. Your perfectly mixed backing track can lose its punch and clarity simply by passing through this inferior component.
Secondly, and perhaps more critically for live performance, is latency. This is the delay between when the computer is told to play a sound and when that sound actually emerges from the output. Built-in sound cards rely on generic drivers that are not optimized for the high-speed, low-latency performance required for music. This delay can be significant enough to cause a noticeable drag between the live performers and the backing tracks, destroying the feel and groove of a song. A dedicated external audio interface is designed specifically to solve these problems, offering high-quality converters and optimized drivers for near-zero latency, ensuring the audio from your computer is as clean and tight as every other source on stage.
The LUFS Mistake That Gets Your Mix Rejected by Netflix
While seemingly disconnected from a loud bar gig, understanding broadcast loudness standards like LUFS provides a crucial perspective on audio dynamics. Live sound engineers operate in a world of Sound Pressure Level (SPL) and transient peaks. The goal is to be impactful and clear in the moment, with a large dynamic range. A loud snare hit should be loud. A quiet vocal should be quiet. However, the world of broadcast and streaming (like Netflix, Spotify, or YouTube) operates on a completely different principle: integrated loudness.
Streaming services don’t care about your peak levels; they care about the average loudness over time, measured in LUFS (Loudness Units Full Scale). They have strict targets (e.g., -14 LUFS for Spotify, -23 LUFS for broadcast) to ensure a consistent listening experience for the end-user, preventing jarring volume jumps between different songs or programs. A mix that is too loud on average will simply be turned down automatically by their algorithms. A mix that is too quiet will be turned up, often increasing the noise floor.
The mistake is applying a live sound philosophy to a broadcast mix, or vice-versa. A punchy, dynamic live mix with lots of headroom might measure -20 LUFS and be turned up for streaming, while a heavily compressed and limited pop master hitting -8 LUFS would be drastically turned down. A mix prepared for Netflix must adhere to their stringent dialogue-based normalization and an integrated loudness of -27 LUFS. A mix that violates this gets rejected. This illustrates that “loudness” is not an absolute; it’s entirely context-dependent. It teaches an engineer to think critically about the destination of their audio and the tools required for each specific job—a compressor serves a very different purpose in a live vocal chain than it does in a final broadcast master.
Key Takeaways
- The proximity effect is a predictable low-frequency boost that can be managed with EQ, not just avoided.
- The goal of “ringing out” a room is to maximize gain-before-feedback by surgically cutting resonant frequencies.
- A microphone’s polar pattern has “null points” or dead zones that should be actively aimed at loud stage noise like drums.
Transitioning from Musical Theater to Opera: The Vocal Adjustment Required
The principles of microphone technique are universal, but their application changes dramatically based on the vocalist’s style. A perfect example is the contrast between a musical theater singer and an opera singer. This transition highlights how vocal projection and mic technique are intertwined, requiring adjustments from both the performer and the sound engineer.
A musical theater singer is trained to work with a microphone. They often use a headset or lavalier mic and rely on the sound system for projection. Their technique focuses on clear diction and emotional delivery at a consistent dynamic level that the engineer can manage. They are accustomed to the intimacy of the microphone picking up every nuance.
An opera singer, conversely, is trained to fill a large, acoustically designed hall without any amplification. Their entire technique is built on creating powerful resonance, controlling their breath to project over an orchestra, and using the acoustics of the venue as an extension of their instrument. When an opera singer is asked to sing into a microphone, it can be a foreign concept. They may not be used to the proximity effect, and their massive dynamic range—from a whisper-quiet pianissimo to a thunderous fortissimo—can be a nightmare for an engineer to control without heavy compression, which can feel unnatural to the singer.
The adjustment is twofold. The opera singer must learn basic mic technique: maintaining a more consistent distance and understanding that the mic is doing the work of projection, allowing them to focus on pure tone. The engineer, in turn, must adapt their approach. Instead of a close-mic technique used for a pop singer in a loud bar, an opera singer may benefit from slightly more distance and a flatter EQ to capture their natural tone without adding boominess. It requires respecting the singer’s acoustic abilities while gently guiding them into the world of amplification. This scenario is the ultimate test of an engineer’s understanding of all the principles we’ve discussed, from proximity to dynamics.
Now that you’re armed with these principles, the next step is to apply them proactively at your next gig. Start by analyzing your stage plot and making a conscious choice about your vocal mic’s polar pattern based on where the drum kit is.